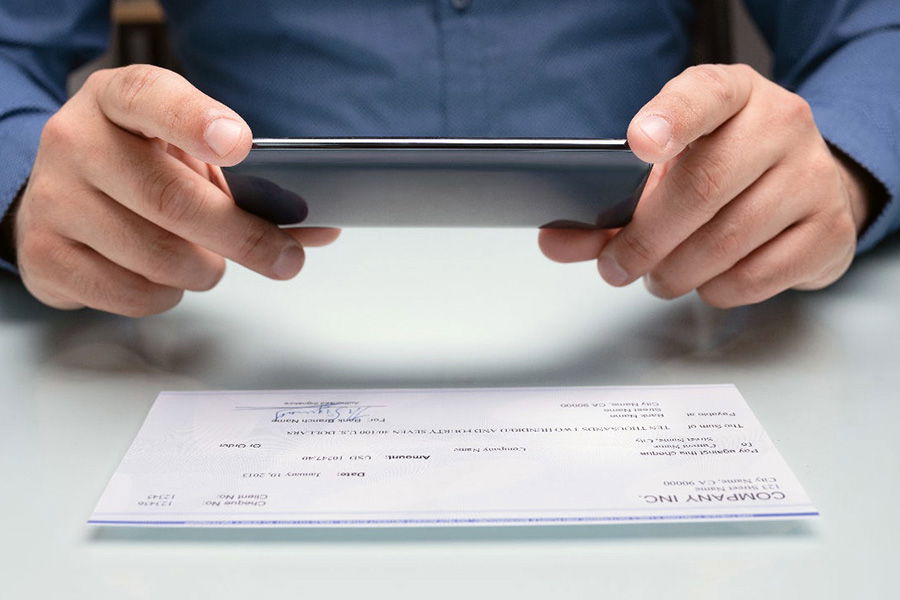
Our banking habits continue to change as technology takes over so many aspects of our financial lives. We can pay bills online, use a digital wallet for transactions in stores and online, and even deposit checks through our bank’s mobile app.
But sometimes, you’ll need to deposit cash or checks at an ATM. Depositing checks at an ATM often means the funds will be available immediately, while it might take a few business days for a mobile check deposit to clear. As for depositing cash, if your bank branch isn’t open, making a deposit at an ATM is your only option.
This article aims to provide a step-by-step guide on how to make a deposit at an ATM.
What You Need Before Using an ATM for Deposits
Before you start using an ATM for your deposit needs, there are a few essentials you must have in place. These requirements ensure a smooth and successful transaction. Here’s what you’ll need:
- Active bank account: It’s essential to have an active bank account, whether it’s a checking account for your day-to-day transactions or a savings account where your funds can increase over time.
- ATM or debit card: Your ATM or debit card is critical as it serves as your access tool to your account through an ATM.
- Personal identification number (PIN): Your PIN acts as a secure code that confirms your identity to the bank when accessing your account.
- Cash or checks: Have your cash or checks prepared for deposit. Note that ATMs may reject bills that are too worn or torn. Additionally, ensure that checks are filled out correctly, including the amount, the payee’s name, and your signature.
- Familiarity with cutoff times: Knowing the cutoff times for ATM deposits at your bank or credit union is important. If you wish for your deposit to be credited on the same day, make sure to deposit before the cutoff time.
How to Locate an ATM That Accepts Deposits
Not every ATM accepts deposits, so it’s important to know how to find one. Here’s how:
- Check your bank’s app or website: Most banks and credit unions provide ATM locators through their mobile apps or websites. These tools can show you nearby ATMs and indicate which ones accept deposits.
- Know the ATM types: ATMs vary in function. While nearly all allow cash withdrawals, only some are set up for cash or check deposits. ATMs located at full-service branches are the most likely to accept deposits.
- Use in-network ATMs: Stick to ATMs in your bank’s network. These usually allow deposits and help you avoid extra fees. Out-of-network ATMs often don’t accept deposits and may charge additional fees for other transactions.
- Look for partner networks: Many banks participate in shared ATM networks like Allpoint, CO-OP, or MoneyPass. These provide you with access to thousands of additional deposit-accepting ATMs with no extra fees.
- Confirm before you go: Even if an ATM appears on a locator map, it’s a good idea to verify its capabilities, especially if you’re traveling or in an unfamiliar area.
How to Deposit Cash at an ATM
Depositing cash in an ATM is a straightforward process. Follow these steps to deposit cash easily and securely.
Step 1: Locate an ATM That Accepts Cash Deposits
Your first task is to find an ATM that can accept cash deposits. Not all ATMs have this functionality, so you’ll need to check. Most financial institutions offer ATM locators on their websites or mobile apps, making it easy to find one that fits your needs.
Step 2: Insert Your Card and Enter Your PIN
Once you’re at the ATM, the next step is to insert your ATM or debit card into the designated slot. You’ll be asked to enter your PIN. Remember, your PIN is confidential; never share it with anyone. If others are waiting to use the ATM, they should stand back several feet. Always obscure the PIN pad or touchscreen so that no one can see your PIN as you enter it.
Step 3: Select the Deposit Option
When the ATM’s main menu comes up, select the “deposit” option, then specify that you’re depositing cash. The process might vary slightly depending on the ATM, but the main steps remain the same.
Step 4: Enter Your Deposit Amount
The ATM will then ask you to enter the amount you’re depositing. Double-check this to ensure it matches the actual cash amount you’re depositing.
Step 5: Insert Your Cash
Next, the ATM will guide you on how to insert your cash into the cash deposit slot. It’s important to follow the instructions to ensure the machine can accurately count your money.
Step 6: Confirm and Collect Your Receipt
After you’ve inserted your cash, the ATM will count it and display the total for you to confirm. Once you’ve confirmed the amount, remember to collect your receipt. This serves as proof of your transaction and is especially important when dealing with cash.
Step 7: Know Your Bank’s Deposit Policies
Even though many banks and credit unions don’t impose a limit on cash deposits at ATMs, it’s a good idea to check your bank’s policies, especially if you’re depositing a large amount of cash.
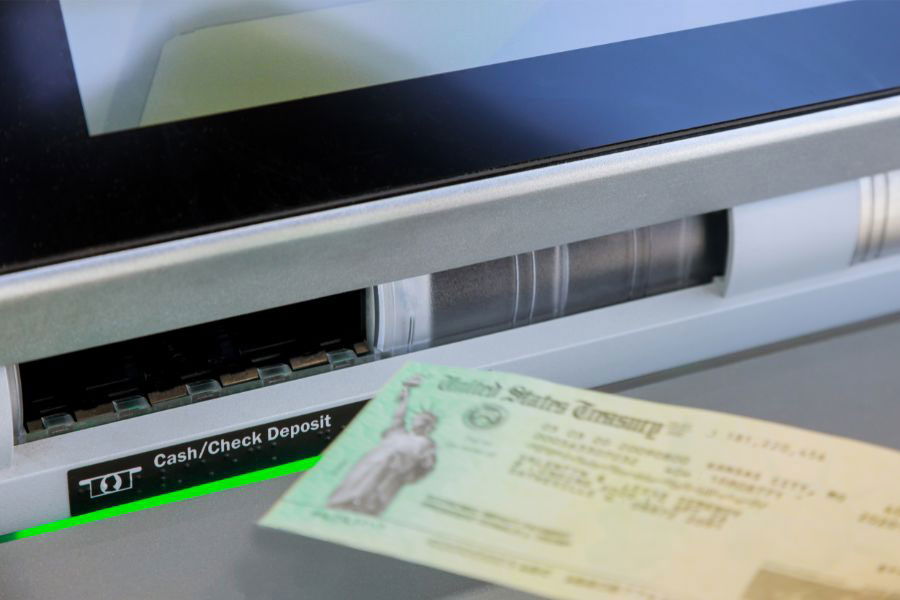
How to Deposit Checks in an ATM
If you’re depositing a check in an ATM for the first time or just need a refresher, don’t worry, the process is straightforward. Here’s a step-by-step guide to help you through it:
Step 1: Start Your Transaction
As with depositing cash, your first step is to insert your ATM or debit card into the machine and enter your PIN. Once you’re at the main menu, choose the “deposit” option, then indicate that you’re depositing a check.
Step 2: Prepare Your Check for Deposit
Before you deposit your check, make sure you’ve endorsed it correctly. This usually involves signing the back of the check in a specific area, but the exact method can vary, so read the back of the check for any instructions.
Step 3: Enter the Check Amount
The ATM will prompt you to input the check amount. Be careful to enter the correct amount to ensure the deposit is processed accurately.
Step 4: Insert Your Check
Next, you’ll need to insert your check into the ATM’s deposit slot. Many ATMs provide clear instructions or visual guides on the screen to help you do this correctly.
Step 5: Confirm Check Information
Once you’ve inserted your check, the ATM will scan it and display the check information on screen. Verify that this information matches the actual check, especially the check amount.
Step 6: Complete the Transaction
After you’ve confirmed the check information, the ATM will process your deposit. As with cash deposits, you should always take a receipt after depositing a check.
Step 7: Understand Your Bank’s Check Processing Times
Check deposits typically aren’t available for withdrawal immediately. Depending on your bank’s policy, the funds could be available as soon as the next business day, but sometimes it may take longer. Check with your bank to understand their specific check deposit policy.
The Pros & Cons of ATM Deposits
Like most banking tools, ATM deposits come with their own set of advantages and drawbacks. Here’s what you need to know:
Pros
- Convenience: ATMs offer the convenience of depositing cash and checks anytime, even outside regular banking hours. For individuals with busy schedules, this flexibility can be a major advantage.
- Saves Time: Avoid the lines at the bank! ATM deposits save time by allowing you to carry out transactions without waiting in line for a teller.
- Multiple Banking Options: Many ATMs, particularly those owned by your bank or credit union, offer multiple banking options beyond deposits, such as cash withdrawals, balance inquiries, and sometimes even bill payments.
Cons
- Potential Fees: Using out of network ATMs for deposits can sometimes result in additional fees. It’s always best to use an ATM within your bank’s network whenever possible to avoid these fees.
- Availability of Funds: When you deposit at an ATM, there may be a delay before the funds become available in your account. This is especially true for check deposits, as the bank often needs time to process the check.
- Limited Transactions for Certain Accounts: While most checking accounts allow unlimited deposits, if you are depositing to high-yield savings accounts or money market accounts, remember these accounts may have a limit on the number of transactions you can make each month.
Final Thoughts
ATMs make it easy to deposit both cash and checks without visiting a branch. Most banks, credit unions, and even today’s no-fee neobanks offer deposit-accepting ATMs, either directly or through shared networks.
It’s important to understand how ATM deposits work, including any limits or fees, to avoid surprises. Learning how to deposit cash or checks correctly can help you manage your accounts efficiently. While ATMs have made banking more convenient, always prioritize security and stay aware of your surroundings during transactions.